Home > Management Interface > Profile > C-Scanning options
C-Scanning options
This section pertains to both the Batch Scan Station and the Import Module default settings.
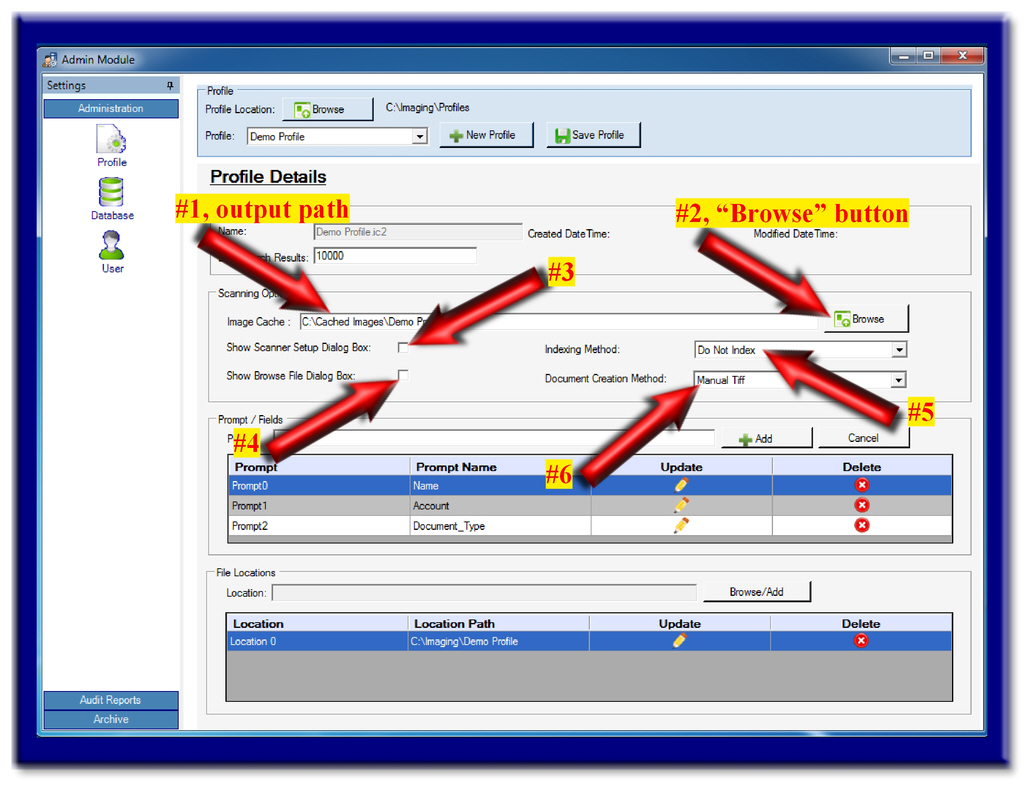
You will see the Output Path (see arrow 1), which represents the local folder for the actual computer or server using the Batch Scan or Import module. In order to change this local folder, select the "Browse" button (see arrow 2).
- Show Scanner Setup Dialog Box (see arrow 3)
- Selecting this option will force the end user to select a specific scanner within the Batch Scanning process each time a scan is performed within the Batch Scan Module.
- Show Browse File Dialog Box (see arrow 4)
- Selecting this option allows the end user to browse their computer or network for a jpg or tiff image to be imported into the Batch Scan Module. For more information about this feature, see the Browse Image Feature of this Help Center (found under: Functions/IMS-Enterprise 4.0/Batch Scan/Browse Image Feature ).
- Indexing Method can be set to the following defaults: (see arrow 5)
- Do Not Index
- After end user has selected the Make Documents button within the Batch Scan Module, the images will be sent to the IMS database to be index at either a later time or even by a different individual.
- Prompt on Scan
- After end user has selected the Make Documents button, the end user will immediately be prompted to enter indexing information.
- Bar Code
- After end user has selected the Make Documents button, the Import Module will know to search for Bar Codes and import into the database automatically populating index fields.
- Document Creation Method (see arrow 6)
- This option will set the the default setting within the Batch Scan Module. End user may manually change this setting within the Batch Scan Module.
Articles in this section
See also