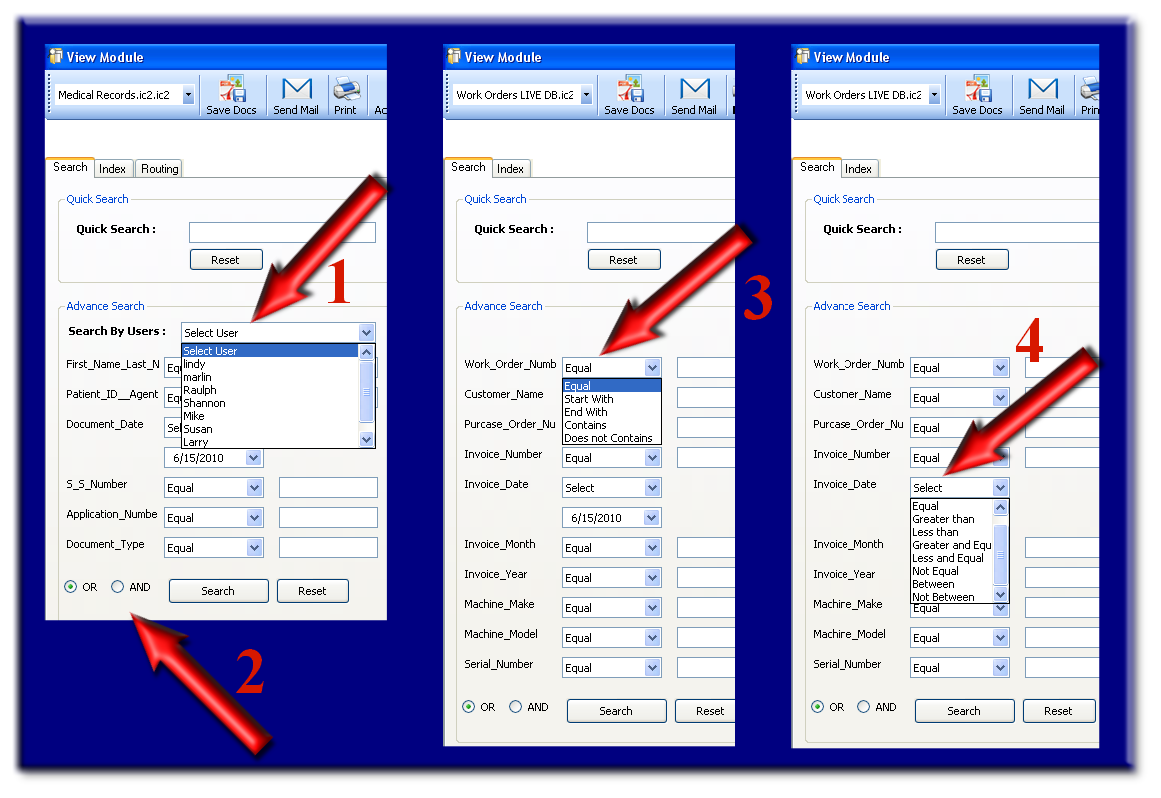
STEP 1
If multiple users are involved in the scanning process, you may choose to include which user actually scanned or indexed the particular document you are searching. (Arrow # 1) In most cases this may be an undesirable option, if so, make sure the default setting is at "Select User."
STEP 2
If you are searching information within 2 or more index fields, you will need to choose either the "OR" or the "AND" option (see arrow # 2).
The "OR" option will typically be a more broad search creating a larger quantity of results. The search will search for all information within the database relative to anything typed within all the index fields, without any direct relationship from one field to the next. This option is mostly used when researching a broader spectrum of information or your knowledge of what to search by is limited and you want to review anything and everything that could be relative.
EXAMPLE for using the "OR" option: You have 5 fields of criteria to search your database named: date, last name, first name, account number, document type. You want to search the database for everything pertaining to John Smith after the date of January 1st 2006. First select the "OR" option. You have only entered data for 3 fields, so you may pull up information to hundreds of people with the name first name John and the last name Smith. If you enter John (first name),Smith (last name), January 1st 2006 (date field with drop down option "greater than"), and the account number; your results may still have too many results. Now, you continue to dig further using the same search, but adding the drop down option for document type and narrow your search. If you still come up with too many results, you might try using the "AND" option (see below example for using the "AND" option).
The "AND" option will typically produce fewer results. The "AND" option provides search results that contain matching information within all the relevant fields that you entered data for the search. For instance, if you entered data within 3 index fields (ie: date, name, document type), all results will have all three fields with the same exact content.
EXAMPLE for using the "AND" option: You have 5 fields of criteria to search your database named: date, last name, first name, account number, document type. You want to search the database for everything pertaining to John Smith after the date of January 1st 2006. First select the "AND" option. You have only entered data for 3 fields, so you may pull up information to multiple people with the name John Smith with hundreds of results. If you enter John (first name),Smith (last name), January 1st 2006 (date field with drop down option "greater than"), and the account number; your results may only have a dozen documents to review. Now, you continue to dig further using the same search, but adding the drop down option for document type and narrow your search to only one to a few documents to review. With each of the search results in this example, every index field reads exactly what you entered.
STEP 3 (using variables)
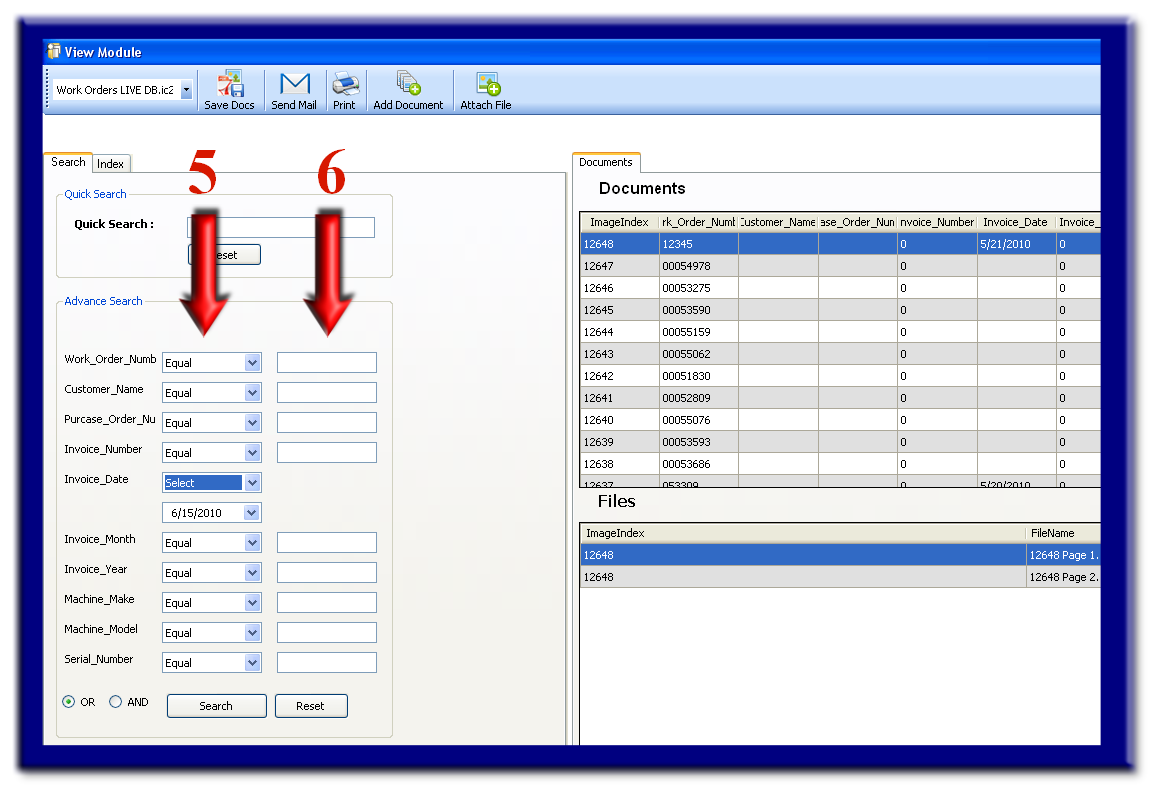
In some cases, you may have a searchable index field that allows you to enter more advanced options or variables based on the content typed or selected from a drop down menu. After you enter the information within the index field (see the column under arrow # 6) you plan to search, you will now select from the drop down menu of variables (see the column under arrow 5).
In some, if not all cases, selecting certain variable options will help you achieve a very refined search when needed.
There are 3 different types of variable options:

NOTE: When using the Date options, "Greater than" refers to being after the date selected and "Less than" refers to being before the date selected.
STEP 4
Now select the "Search" button within the Advanced Search box.
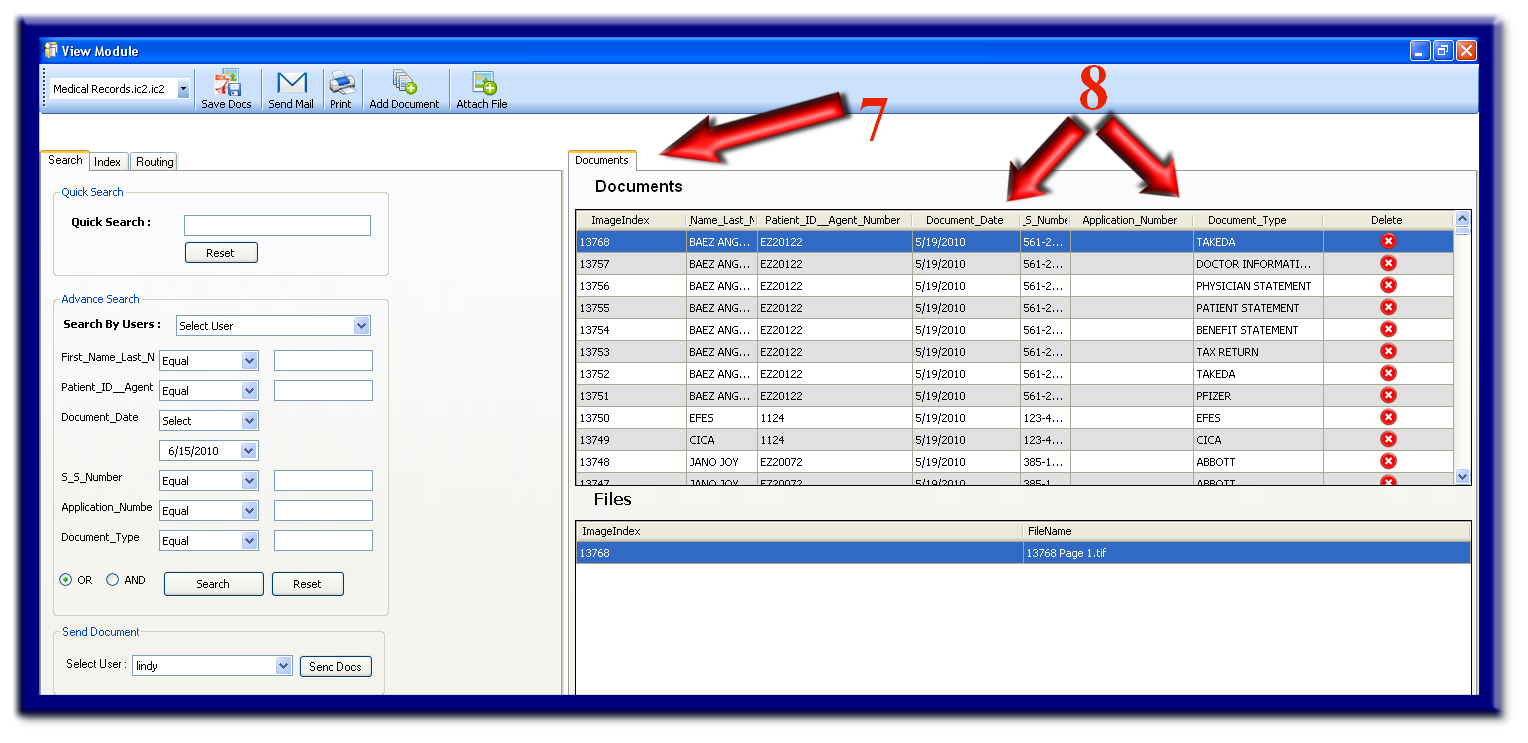
STEP 5
You will now be able to view your search results within the Documents View Window (see arrow # 7). You will also notice columns of data matching each index field within the profile, regardless if any information was found (no content is simply blank or empty as seen under the Application Number column) (see arrow # 8).
STEP 6
Finally, one last great feature drilling even further into your search result, is to sort by column. If you are familiar with spreadsheets (ie: MS Excel) or databases (ie: MS Access), you will know the simplicity and sometimes powerful feature of sorting by column.
Maybe you performed a simple search with many results with foreknowledge of using the sort by column feature or you created a very detailed search, sorting by column can always become helpful.
To sort by column, simply mouse click the actual button naming the column (see arrow # 8).
You are now ready to view, which is found within the "View Search Results " section of this Help Center: