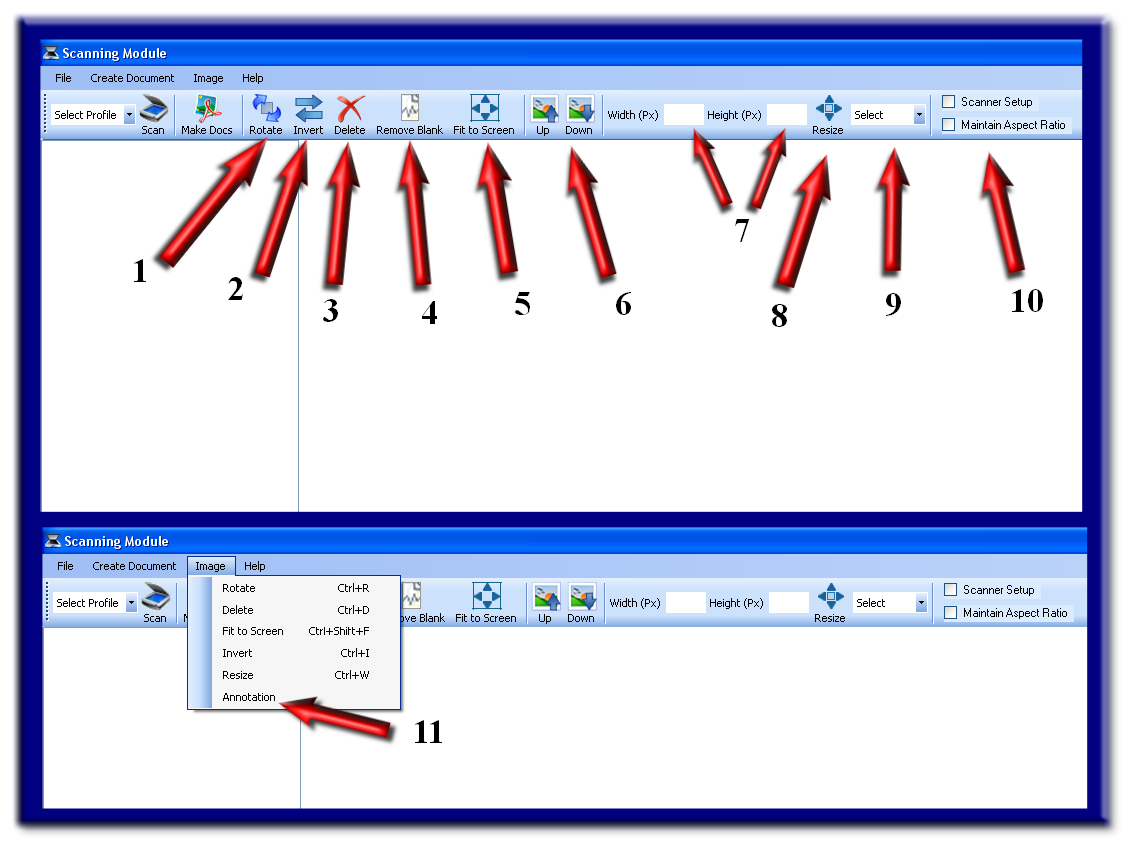
1) If an image was accidently scanned with the wrong orientation, select the rotate button (see arrow # 1) to turn the image until it is correct. This feature saves time rather than rescanning this one document or scanning the entire batch all over again. Please note that it may be important to have correct orientation if OCR or Bar Codes are to be read.
2) Invert an image if it is not very legible. Sometimes this feature works well with a poor quality fax.
3) Delete a single page or use the Control Key on your keyboard to select multiple pages for deletion. You can select the entire batch for deletion by selecting the top image (using mouse), then the Control and Shift Keys simultaneously, and finally select the last image of the list (using mouse). Now select the delete button.
4) If your scanner does not support blank page removal, you may use this feature to perform the same function. Simply select this button and it will remove all blank pages within the scanned list. Please consider using your scanner's blank page removal feature if possible, giving you more advanced functionality (ie: pixel saturation of 1% to 5% coverage options).
5) If for whatever reason the scanned image is too large, select this feature to view the entire scanned image on your screen.
6) Use the up and down buttons to move a selected image exactly where you might need it within the list. This feature will come in handy if a document was scanned out of order. This feature is also needed if replacing a document already scanned or adding a document to the list.
7-10) Resize the documents or pictures scanned by adding the desired pixel measurements (see arrows 7). Select the image before entering the width and/or height pixel measurements. You may now select the resize button (see arrow 8). For maintaining the aspect ratio, select the checkbox (see arrow 10) before entering the width or height pixel measurements, then select the resize button (see arrow 8).
9) For a more simplistic resize of a document or image, select a percentage for the drop down list (see arrow 9).
10) If you would prefer to be prompted each time you select the scan button for choosing a different scanning device, make sure the checkbox is selected for the scanner setup box (see arrow 10)
11) Annotations are now offered within the Batch Scan Module. Any annotations made to a Tiff can be removed at a later time, but annotations to a PDF are irreversible.