STEP 1
This module allows you to view each and every single page to ensure accuracy and quality control.
First, select the scan button (see arrow below). Typically, the scan driver to the attached scanner will open. Make any preferred changes necessary and then select the appropriate button required to begin the scan (within the scan driver). You will begin to see a list of sequential numbers populate the Image View Bar (see arrow below).
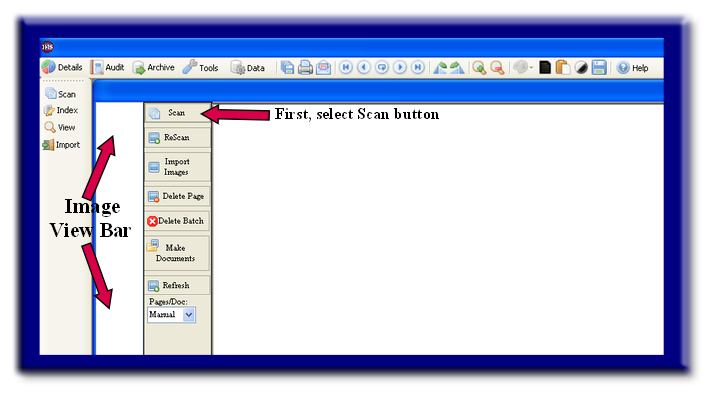
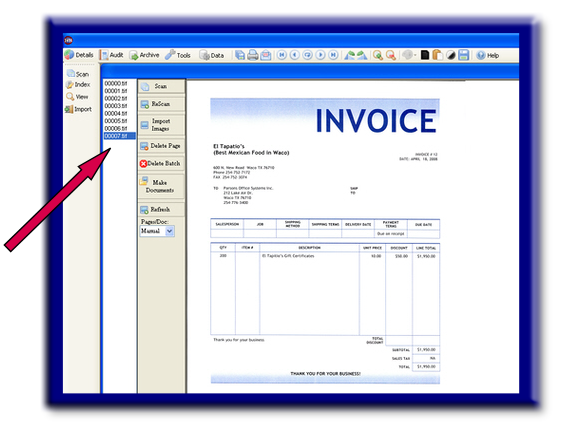
If a page within the list needs to be removed, simply select the image and then select the Delete Page; or if this same image was simply a inadequate scan, you can select ReScan for that image only.
You may also select Import Images to add to this list of scanned documents. These images must be tiff (see import in this manual).
Note: Delete Batch button will delete all images listed within the Image View Bar, not just the last scan.
STEP 2 (see image below)
VIEW
To view a page, click on the file and the page will open.
CHANGE
You have a number of choices for enhancing the image before saving to the database. (see arrows)
SAVE
You can save any changes by clicking the Save Changes button (disk icon). Remember, this save button must be selected after making any changes and moving on to the next image.

STEP 3 (see image below)
Once you have scanned the pages, you will need to group them into documents. If each document contains a different number of pages, select Manual from the Pages/Doc: drop down and then click on the last page of the first document in the Image List, then click Make Documents.
For example, if you scanned 20 pages that make up 3 different documents, you will see 00000.tif – 00019.tif in the image list. If the first document is two pages long, you will click the second image (00001.tif) and click Make Documents. When you click Make Documents, 00000.tif and 00001.tif will be made into one file and moved to the filing location. Then the remaining pages are moved up and renamed so you will now see 00000.tif – 00017.tif in the image list. If the next document is ten pages long you will click the tenth image (00009.tif) and click Make Documents. The remaining pages are moved up and renamed. The image list now contains 00000.tif – 00007.tif. The last document contains all eight of the remaining pages, so you click the last image (00007.tif) and click Make Documents.
If each of the documents you scanned contains the same number of pages, you select the number pages you want in each document from the Pages/Doc: drop down, and then click Make Documents.
For example, if you scanned ten documents and each of them is two pages long, you will select 2 from the Pages/Doc: drop down and click Make Documents. 00000.tif and 00001.tif will be made into one file and moved to the filing location. Then 00002.tif and 00003.tif will be made into one file and moved to the filing location. IMS will continue doing this automatically until all the pages in the image list are made into documents.
If you close the Scan window before all the documents are made, IMS will save the pages. Next time you open the Scan window, the pages will still be in the Image List. You can also scan more pages and they will be added to the bottom of the Image List. Once you are through making documents, you are ready to begin indexing.
STEP 4
You may now proceed to the Index page under the See also (below).