Home > Management Interface > Users > User Management
User Management
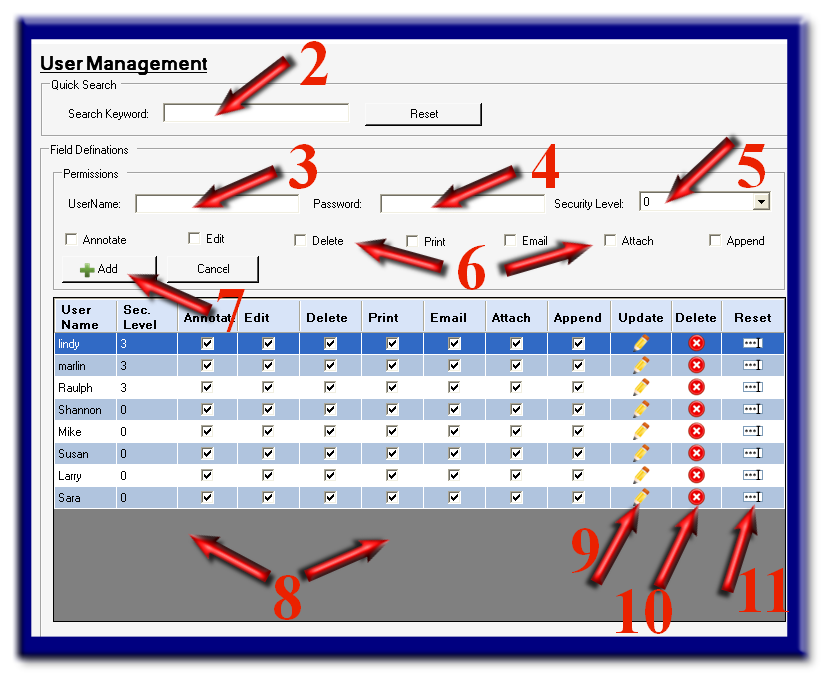
The User Management screen allows you to add, change, or delete user activity per each Profile.
Don't forget, you must have selected "Enable User Level Permissions" option within the Database section of this Management Interface in order to access and add User tables to a Profile.
Select the "User" icon (see arrow 1).
For large user lists, you can use other sources for managing your user data list. If building this list in MS SQL Server, per say, IMS can use the SQL table you build as the source, instead of using this User Management utility. You may also choose to use both methods simultaneously. Contact your Authorized IMS Reseller for more details and assistance.
Quick Search
Type in the "Search Keyword" box (see arrow 2) for a user and view results within spreadsheet at bottom of page (see arrow 8).
Field Definitions
This section allows you to create new users, one at a time.
Steps to create a User:
- Select a Profile (see arrow 12).
- Enter user's name within the "User Name" box (see arrow 3).
- Enter users password within the "Password" box (see arrow 4).
- Select a security level for the user (see arrow 5). Security Level 0 gives user no security limitations. Security Levels 1 (least restrictive) to 5 (most restrictive) are all optional as to what you prefer creating within your organization and how many levels of security you need to maintain. This security level can be applied to any document or electronic file scanned into this Profile.
- Select any features (annotate, edit, delete, print, etc.) you would like to allow the user to have (see arrow 6).
- Finally, Select the "Add" button
- You will now find this user within the list of users (see arrow 8).
Steps to change status, password, or delete a User:
Select a user from the list (see arrow 8) by clicking the "Update" icon (see arrow 9). You will see this users data populated within fields 3, 4, 5, and 6. Make any changes necessary and save these changes by selecting the "Update" button (see arrow 7). This "Update" button is also the "Add" button when you are not in the update mode.
You may choose to Delete users by selecting the "Delete" icon (see arrow 10).
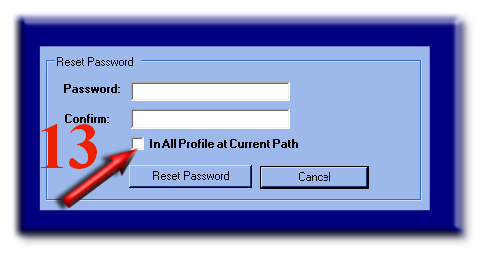
If all you desire is to change a user's password, select the "Reset" icon (see arrow 11). If this same user name exists within other Profiles stored within the same file path, you have the option to reset this user's password for all profiles by selecting the "In All Profile at Current Path" button (see arrow 13).

See also